


Before you even think about tackling that stain, hold on. I’ve seen it a hundred times: someone rushes in with a cloth and a bottle of mystery cleaner, only to turn a small spill into a massive, permanent disaster. The real secret to a successful clean isn't elbow grease; it’s a little bit of prep work.
Taking a few minutes to locate the cleaning code, do a quick patch test, and give the furniture a thorough vacuum is non-negotiable. These simple checks are your best insurance policy against ruining your favourite armchair.
Your Pre-Cleaning Upholstery Checklist
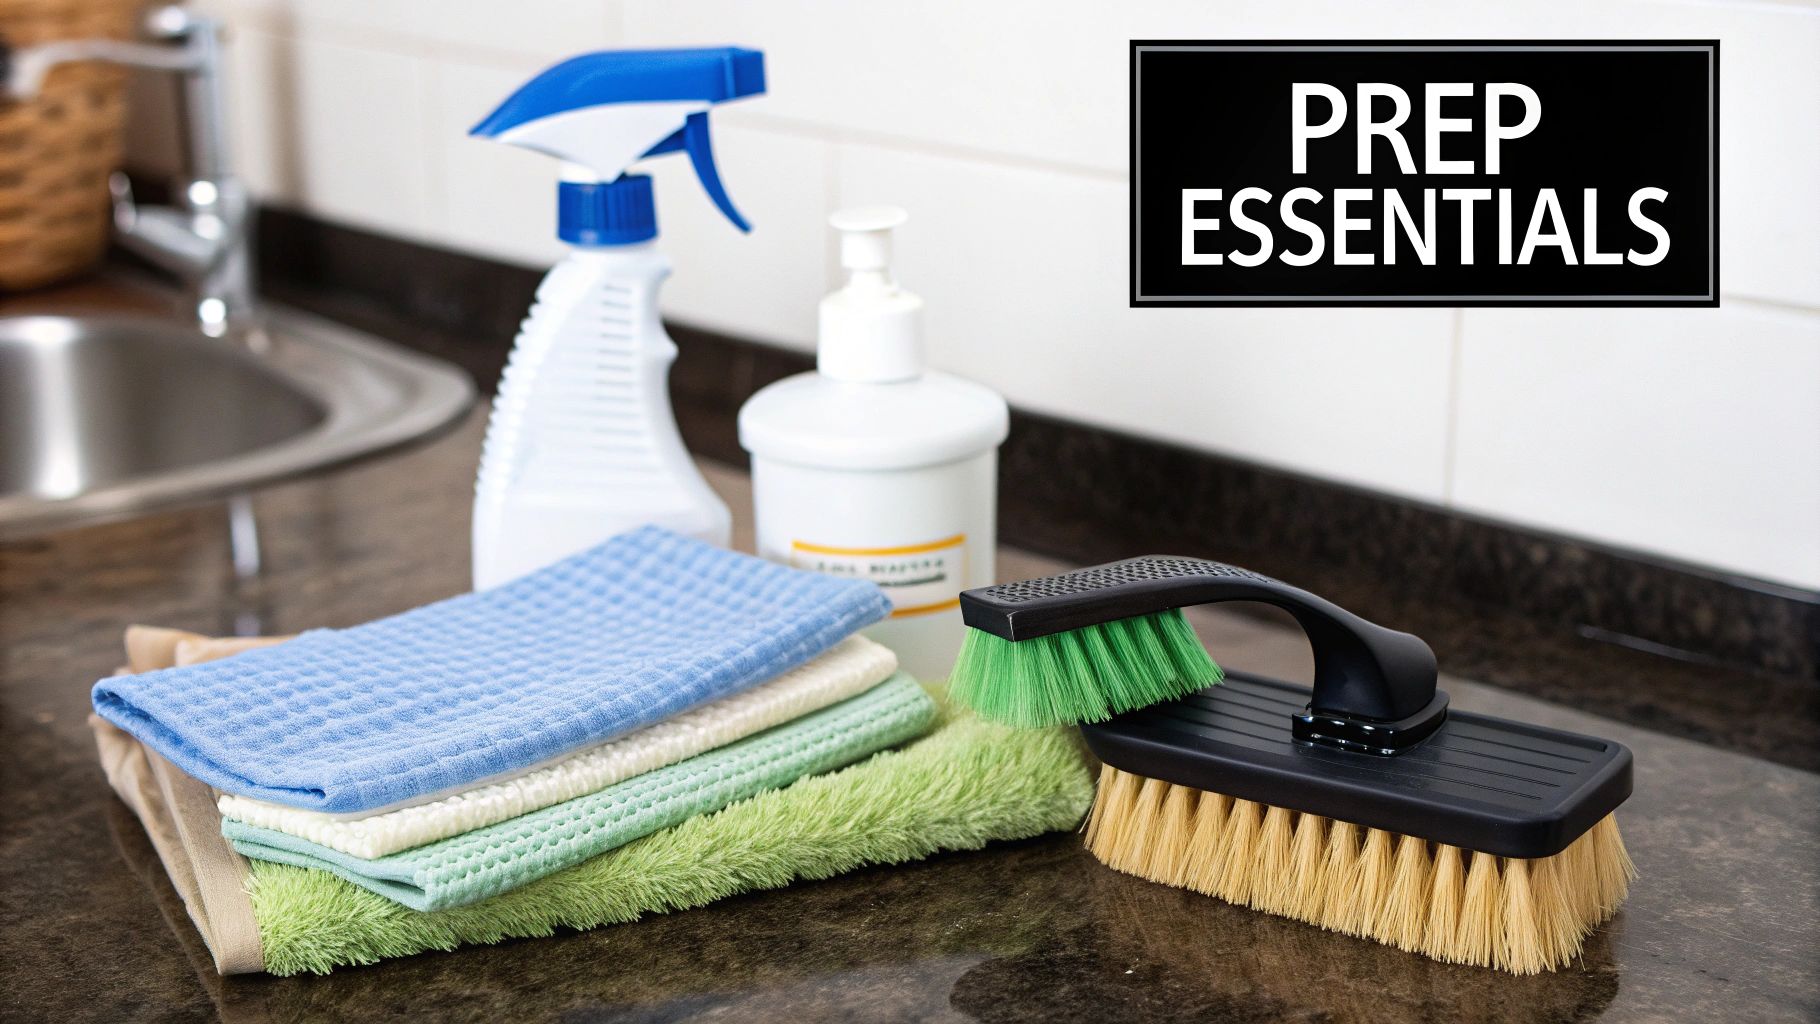
Before a single drop of cleaner touches your sofa, you need a game plan. Skipping these initial steps is the most common mistake people make, and it often leads to faded colours, ugly water rings, or even permanent fabric damage. Trust me, spending 15 minutes on this now can save you from a major furniture headache down the line.
Remember, the goal isn't just to blitz a single stain. It's about refreshing the entire piece without harming the very material it's made from. This prep phase is the foundation for getting it right.
Find and Understand the Cleaning Code
First things first, you need to play detective. Every piece of professionally made furniture has a care tag. You'll usually find it tucked away along a seam, under a cushion, or on the underside of the frame. This tag holds the single most important clue for your cleaning mission: the cleaning code.
This one little letter will dictate your entire approach.
- W: Go for it. This means you can safely use water-based cleaning solutions.
- S: Stop! This code stands for 'solvent', meaning you need a specific water-free cleaner.
- WS: You're in luck. You have the flexibility to use either water-based or solvent-based cleaners.
- X: This is the most delicate of all. It means vacuum only. No water, no solvents, no exceptions.
Ignoring this code is the quickest way to ruin your upholstery. I've seen people use water on an 'S' code fabric, and the giant water stain it leaves behind is always far worse than the original spot.
Perform a Crucial Patch Test
Once you know what type of cleaner to use, you absolutely must test it. Never, ever apply a new cleaning solution directly to a visible part of your furniture—I don't care if the bottle promises miracles.
Find a hidden spot for your test. The back of the sofa's skirt, an inside seam, or any area that's permanently against a wall is perfect. Apply a tiny amount of your chosen cleaner with a clean, white cloth. Let it sit for a few minutes, then blot the area with a second, slightly damp cloth and let it dry completely.
Key Takeaway: Once it's dry, check the test spot for any colour bleeding, fading, or changes in the fabric's texture. If the fabric looks exactly the same, you’ve got the green light to proceed. This simple test is your ultimate safety check.
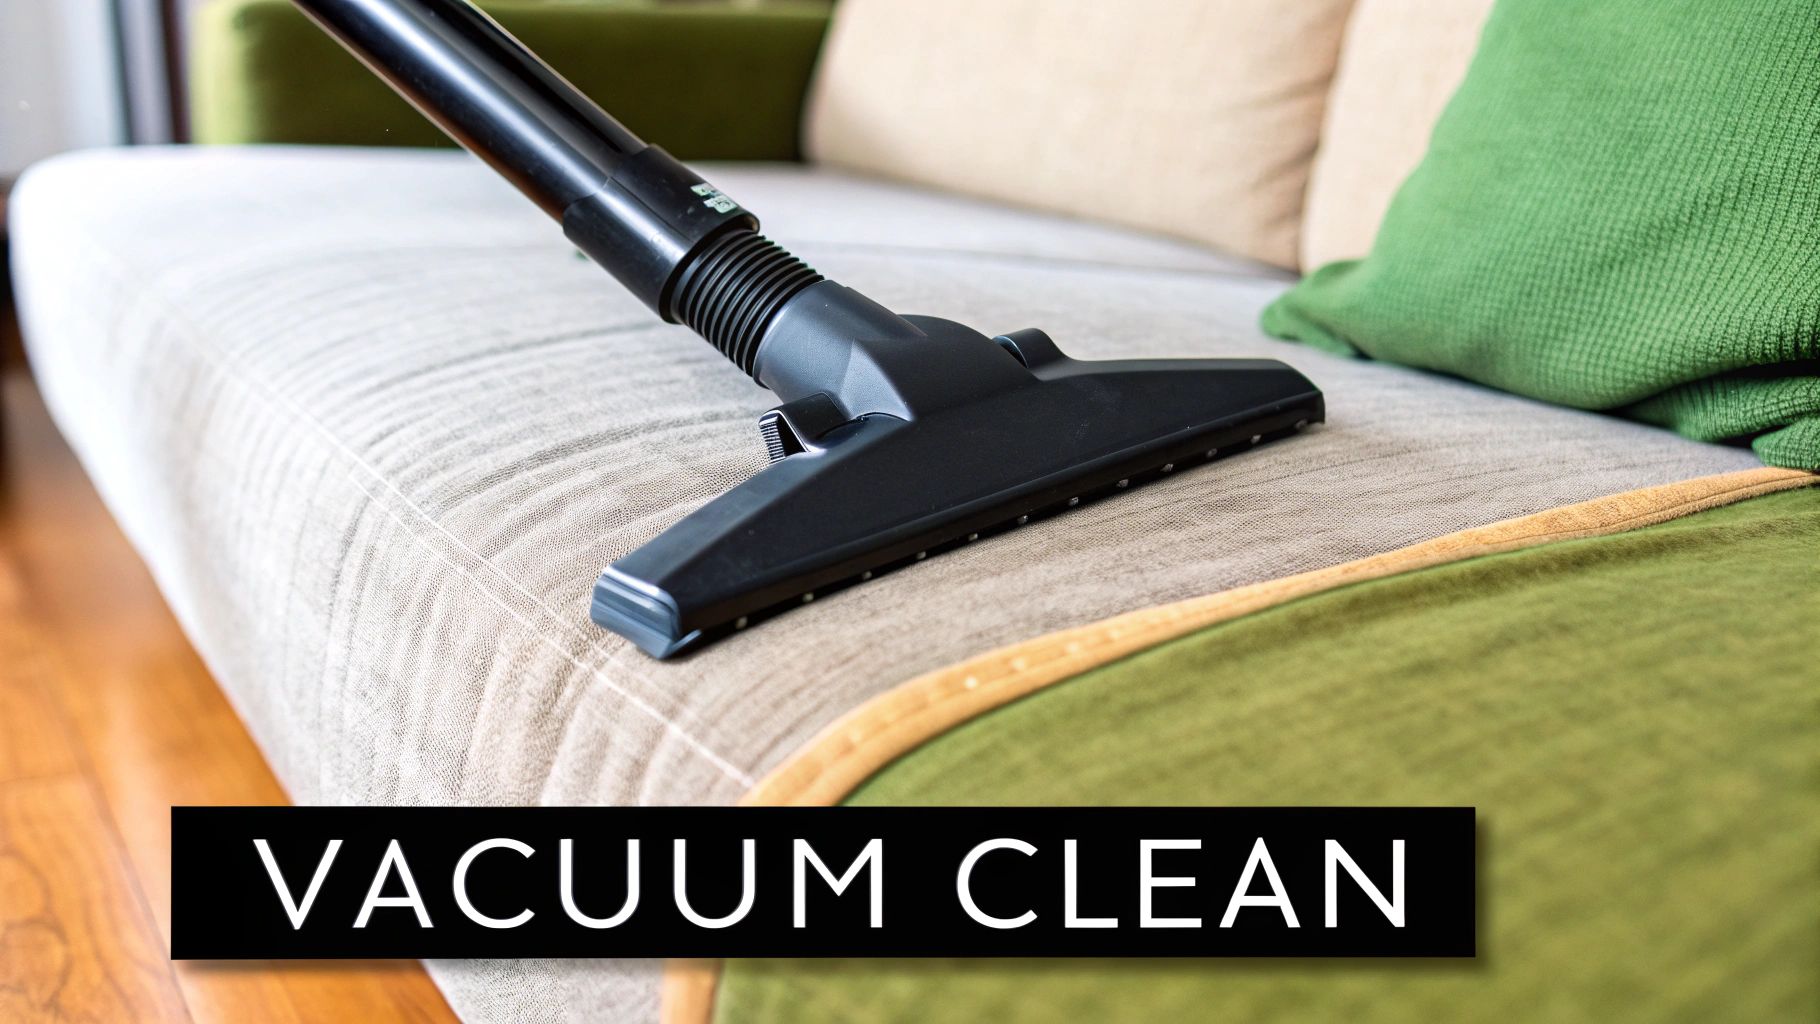
Vacuum Thoroughly Before Cleaning
The last prep step is to give your furniture a really good vacuuming. All that surface dust, pet hair, and those biscuit crumbs might seem harmless, but the moment they mix with a cleaning solution, they turn into a muddy sludge. This just makes more work for you and can grind that grit deeper into the fabric fibres.
Use your vacuum’s upholstery attachment for the main surfaces and the crevice tool to get right into the seams and corners where all the gunk loves to hide. If you have a family sofa, you'll be amazed (and maybe a little horrified) at what you find between the cushions.
This isn't just a quick once-over. A proper vacuuming removes the abrasive little particles that wear down your fabric over time. It’s a vital maintenance step in its own right, and it primes the surface for a much more effective deep clean. With these checks done, you’re ready to get cleaning.
Matching Cleaning Methods to Your Fabric Type
Using the wrong cleaning product on your favourite couch is a bit like washing a wool jumper in hot water—the result is often irreversible and heartbreaking. Not all fabrics are created equal, and what works wonders on a tough polyester lounge suite could spell disaster for a delicate linen armchair.
The real secret to getting your upholstery clean without any drama is matching your method to the material. Before you even think about tackling a stain, you need to know exactly what you’re working with. This starts with the manufacturer's cleaning code, but it’s also incredibly helpful to understand the unique personality of the fabric itself.
Think of it as getting to know your furniture. This little bit of homework will give you the confidence to clean effectively without causing any accidental damage.
Decoding Your Furniture's Cleaning Tag
That small, often-hidden tag you found during your pre-cleaning check? That's your roadmap. It uses a simple letter code to tell you exactly which types of cleaners are safe for your fabric. Getting to grips with these codes is probably the single most important part of the entire process.
To make it simple, we've put together a quick reference table. Use this to quickly decode your furniture's tag and choose the right cleaning approach.
Quick Guide to Upholstery Cleaning Codes
| Cleaning Code | What It Means | Safe Cleaning Methods |
|---|---|---|
| W | Water-Based Cleaner | You can safely use water-based shampoos or foam cleaners. DIY solutions with water, vinegar, or gentle soap are generally fine after a patch test. |
| S | Solvent-Based Cleaner Only | Do not use water. This fabric requires a specific dry-cleaning solvent to avoid rings and shrinkage. |
| W/S | Water or Solvent Cleaner | You have options. Both water-based and solvent-based cleaners are safe to use on this durable fabric. |
| X | Vacuum Only | This is the most delicate category. Do not use any water or solvent cleaners. Cleaning is restricted to vacuuming or light brushing. |
This little table can save you a world of trouble. Knowing the code means you're already halfway to a successful clean.
A Word of Warning: I can't stress this enough—using water on an 'S' code fabric can cause significant, often permanent, water stains. It might even make the fabric shrink or warp. Always, always respect the code.
Common Upholstery Fabrics in Australian Homes
Beyond the official code, knowing your fabric type helps you anticipate how it will react to cleaning and everyday life. Different fibres have distinct characteristics, and you’ll find a few usual suspects in most Aussie homes.
Durable Synthetics
These man-made fabrics are the unsung heroes of family homes. They’re often chosen for their resilience and ease of cleaning, which is a lifesaver when you've got kids or pets.
- Polyester: This is a true workhorse. Polyester resists stains, fading, and wrinkling like a champion. It usually has a 'W' or 'W/S' code, making it one of the easiest fabrics to clean at home.
- Microfibre: Famous for its soft, velvety feel and tight weave, microfibre is fantastic at repelling water and resisting stains. Most microfibre couches are coded 'W' or 'W/S'. Its dense fibres can trap dust, though, so regular vacuuming is a must.
Classic Natural Fibres
Natural fibres bring a beautiful texture and breathability to a room, but they often need a gentler touch when it comes to cleaning.
- Cotton: While comfy and versatile, cotton can be prone to wrinkling and tends to soak up spills quickly if it isn't treated. Its cleaning codes can vary widely, so checking that tag is absolutely essential.
- Linen: Prized for its cool, crisp feel, linen is highly absorbent. This means it can shrink or wrinkle easily if you use too much water. It often comes with an 'S' code, pointing you towards a solvent-based clean.
- Wool: A durable and naturally flame-retardant choice, wool is great at resisting soiling. However, it can be fussy. It usually requires careful cleaning with cold water to prevent shrinking.
- Velvet: This luxurious fabric is a special case. It can be made from natural or synthetic fibres, which completely changes its cleaning needs. If you have a velvet piece, it’s worth learning about the difference between velvet and other fabrics in our dedicated guide.
Once you combine the manufacturer's code with a basic understanding of your fabric's traits, you're empowered. You can choose the perfect cleaning approach with confidence, ensuring your furniture doesn’t just get clean, but stays beautiful for years to come.
Crafting Effective DIY Upholstery Cleaners

You really don't need a whole cupboard of pricey, specialised products to get your fabric upholstery looking its best. I've found over the years that some of the most reliable and powerful cleaners can be whipped up right in your kitchen, using a few simple staples you probably already have on hand.
Making your own cleaning solutions gives you total control over the ingredients—a huge win for households with kids, pets, or anyone sensitive to harsh chemicals. Better yet, these DIY recipes genuinely work. The secret is knowing why they work and how to mix them for the best, and safest, results.
The All-Purpose Vinegar and Water Solution
For any fabric that has a ‘W’ or ‘W/S’ on its cleaning tag, a straightforward vinegar solution is your best friend for a general clean. White vinegar is a natural workhorse; its acetic acid gently breaks down everyday grime, neutralises odours, and lifts light stains without leaving behind a soapy residue.
Mixing it couldn't be simpler:
- Combine one part white vinegar with one part lukewarm water in a clean spray bottle.
- Give it a good shake to make sure the two are thoroughly mixed.
- Always, and I mean always, do a patch test on a hidden spot first.
This simple mix is my first port of call for an overall refresh. It’s especially good at tackling that general "lived-in" smell furniture can get over time.
Why This Works: It's basic chemistry, really. The acidity of the vinegar dissolves the alkaline properties found in most common dirt and grime. This simple reaction lifts away the buildup right on your sofa cushions without needing any aggressive chemicals.
A Gentle Dish Soap Degreaser
So, what about those slightly more stubborn, oily spots? Think greasy fingerprints on an armchair or a minor food spill. For those, a gentle dish soap solution is surprisingly effective. The surfactants in dish soap are made to cut through grease on your dinner plates, and they do the exact same thing on fabric fibres.
You only need a tiny bit of soap to create a potent degreaser.
- Start with two cups of lukewarm water in a small bowl.
- Mix in one teaspoon of clear, mild dish soap. Try to avoid any with added colours or strong scents.
- Gently whisk the solution until it gets a little sudsy. You’re not looking for a mountain of foam, just a well-combined cleaner.
To apply it, dip a clean microfibre cloth into the water (not the suds), wring it out until it’s just damp, and gently dab at the stain. This method works wonders on those mystery marks that vinegar alone can’t quite shift.
The Importance of Safety and Ratios
Just because these cleaners are homemade doesn't mean you can throw caution to the wind. Never mix vinegar with hydrogen peroxide or bleach, as this can create dangerous toxic fumes. Stick to one simple recipe at a time.
Getting the mixing ratios right is also crucial. When it comes to DIY cleaners, more is definitely not better. Using too much vinegar can leave a strong smell, while too much soap will create a sticky residue that ends up attracting even more dirt. Stick to the proven recipes and always, always patch-test. That's the golden rule for successfully cleaning fabric upholstery at home.
The move towards eco-friendly and safe cleaning solutions is reshaping the industry. In fact, the Australia-New Zealand upholstery cleaning market is projected to grow by 4.8% annually through 2035, driven largely by demand for non-toxic products that are safe for families and pets. This shift really shows how much homeowners today value healthy, effective cleaning methods.
Of course, a big part of long-term care is knowing which fabric best suits your lifestyle in the first place. If you're curious about how different materials stack up, our guide on choosing between leather, fabric, or velvet for sofas is a great resource. Making an informed choice from the get-go makes cleaning so much easier down the track.
Alright, you've done your homework. You've figured out your fabric type, picked a cleaner, and successfully spot-tested it. Now for the main event: giving that upholstery a proper deep clean.
The biggest mistake I see people make is just going for it and soaking the entire couch at once. You have to resist that temptation! The secret to a professional-looking finish is a methodical approach. It stops you from over-saturating the fabric, which is what causes those awful water stains and rings.
Think of it like mowing a lawn or painting a wall. You work in small, deliberate sections for an even, seamless result. I usually aim for an area about the size of a dinner plate at a time. This gives you total control.
Applying the Cleaner and Lifting the Grime
Grab a clean, white microfibre cloth and get it damp with your cleaning solution. And I mean damp, not soaking wet. Wring it out until it’s not dripping at all. Applying the cleaner sparingly is crucial; if you drench the fabric, the moisture can seep into the padding underneath, leading to musty smells or even mould down the track.
Now, gently dab or blot the solution onto your first section. Never scrub aggressively. That’s a fast track to damaging the fabric fibres and causing pilling. Let the solution sit for a few minutes—give it a chance to work its magic and break down the grime.
Next, take a second clean, dry microfibre cloth and press it firmly onto the same spot. The goal here is to blot up both the cleaning solution and all the dirt it has loosened. You'll actually see the grime transferring to the dry cloth, which is incredibly satisfying. Just keep repeating this process, moving from one section to the next with a slight overlap to avoid leaving any tell-tale lines.
The image below gives you a simple, effective recipe for a DIY cleaner.
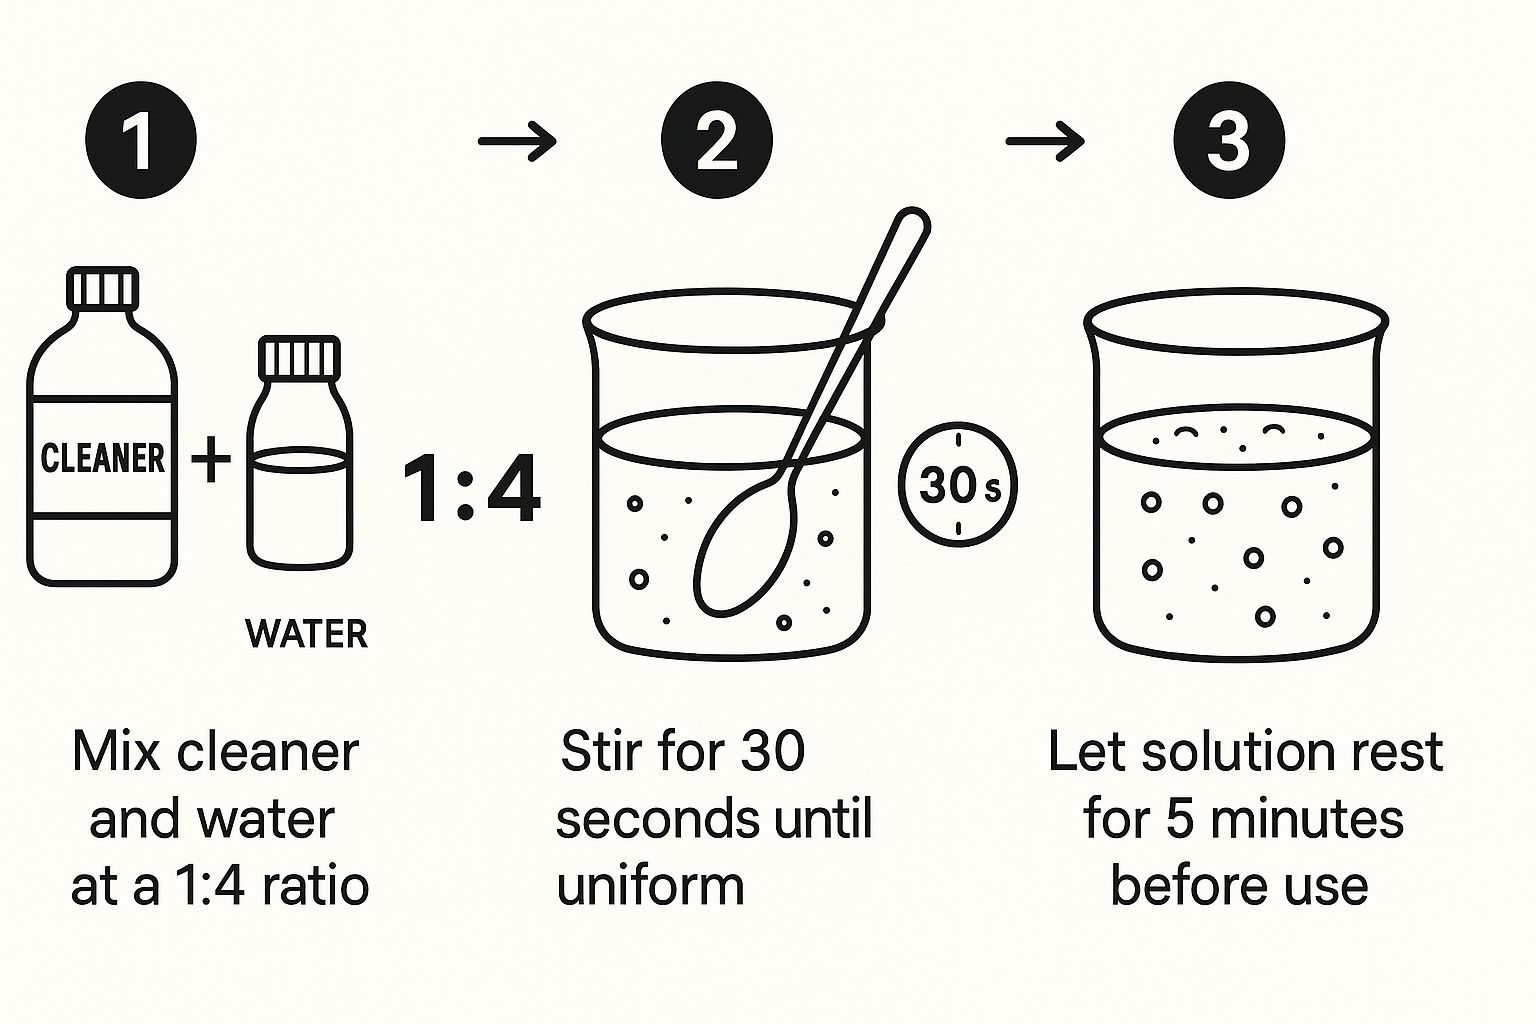 It really shows how getting the ratios right is key to creating a solution that’s tough on dirt but gentle on your furniture.
The Final Rinse (Don’t Skip This!)
Once you’ve worked your way across the entire piece of furniture, you need to do a final "rinse". This is the step that separates a good result from a great one. It removes any lingering cleaning residue that, if left behind, can dry to a stiff or sticky finish that actually attracts more dirt.
And don't worry, you won't be hosing down your sofa. The technique is almost identical to the cleaning process, just with one simple change.
- Get a fresh, clean microfibre cloth.
- Dampen it with plain, clean water.
- Wring it out until it’s barely damp.
- Gently blot the entire surface of your upholstery, again working in those manageable sections.
This light dampness is just enough to lift away any leftover cleaner without soaking the fabric all over again. It truly makes a world of difference to the final feel of the upholstery.
Pro Tip: If your cleaning mix had vinegar in it, you might catch a slight whiff of it during the rinse. Don't stress—that smell will vanish completely as the fabric dries, leaving things fresh and neutral.
Getting It Dry, Fast and Even
The last, and arguably most critical, stage is drying. If you get this right, you'll prevent any chance of musty smells or mildew from setting in. It’s all about getting air to circulate around the furniture.
Crack open some windows and doors to create a nice cross-breeze. If you're dealing with high humidity or just want to speed things up, a simple fan pointed at the couch is your best friend. The goal is to get the fabric to dry as quickly and evenly as possible.
Finally, and this requires some patience, don't sit on the furniture or put anything on it until it is 100% dry to the touch. Depending on the fabric and how humid it is, this could take a few hours or even a full day. Waiting it out is the final secret to getting that crisp, professionally cleaned finish.
How to Remove Tough Upholstery Stains
Let’s be honest, life happens on our furniture. A guest gets a bit too animated with a glass of red wine, or your morning coffee decides to take a nosedive. The real trick isn't trying to prevent these little mishaps, but knowing exactly how to handle them when they occur. Acting fast and smart can be the difference between a quick clean-up and a permanent reminder on your favourite armchair.
Think of this as your go-to playbook for tackling some of the most common—and stubborn—stains. It's all about having a targeted strategy, whether that means a quick DIY fix or reaching for a specific store-bought cleaner.
The Golden Rule: Always, always blot, never rub. Rubbing a fresh spill only grinds the stain deeper into the fabric fibres, making your job a whole lot harder.
First Aid for Fresh Spills
When a spill has just happened, time is your best friend. Getting to it in the first few minutes can often stop a stain from ever truly setting in. Here’s how you can tackle a couple of the usual suspects.
Red Wine Spills That heart-stopping splash of red on a light-coloured sofa doesn't have to be a disaster. Don’t panic. Just head for the pantry and grab the salt shaker.
First, blot the spill gently with a clean, dry cloth to soak up as much of the wine as you can. Then, generously cover the entire stain with plain table salt. The salt will immediately start to draw the remaining wine out of the fabric – you’ll actually see it turn pink as it works.
Let the salt sit for at least a few hours, or even overnight if possible. Once it's completely dry, just vacuum it all up. You'll be amazed at how much of the stain comes with it. If a faint mark lingers, you can treat it with a cleaner that’s safe for your fabric’s ‘W’ code.
Grease or Oil Stains From a stray drop of salad dressing to a greasy fingerprint, oil-based stains need a different approach. Your secret weapon here is baking soda or even cornflour. These fine powders are brilliant at absorbing oil.
- Start by carefully scraping off any solid gunk with a dull knife.
- Liberally sprinkle baking soda or cornflour right onto the greasy spot.
- Give it at least 15-20 minutes to sit and soak up the oil.
- Vacuum the powder away. If there’s still a mark, treat the spot with a tiny dab of mild dishwashing liquid solution and blot clean.
Tackling Older, Set-In Stains
What about those mystery stains you discover long after they happened? These demand a bit more patience and a more targeted cleaning solution. It’s absolutely crucial to check your furniture’s cleaning code (‘W’, ‘S’, ‘W/S’, or ‘X’) and always do a patch test in a hidden spot first.
Coffee or Tea Marks That dried coffee ring on a ‘W’ or ‘W/S’ code fabric can often be defeated with a simple vinegar solution.
Mix equal parts white vinegar and lukewarm water in a spray bottle. Lightly mist the stained area—you want it damp, not soaking wet. Let the solution sit for 5-10 minutes to work its magic and break down the stain. Finally, gently blot the area with a clean, damp cloth, working from the outside of the stain inwards to stop it from spreading.
Ink Stains An accidental pen mark on an ‘S’ code fabric might seem permanent, but rubbing alcohol can be surprisingly effective.
Dampen a cotton ball or the corner of a clean, white cloth with rubbing alcohol. Gently dab at the ink mark. You should see the ink start to transfer from the upholstery onto your cloth. Keep dabbing with a fresh section of the cloth until the ink is gone, then let the area air dry. The alcohol will evaporate quickly on its own.
Thinking ahead can also save you some stress. If you're in the market for a new piece, our guide on how to choose a perfect sofa colour has some practical advice for busy households where spills are a fact of life.
When a Stain Just Won't Budge
Sometimes, no matter what you do, a stain refuses to leave. This often happens with very old, unknown stains or with fabrics that have absorbed certain dyes. If you’ve tried the correct method for your fabric type and the mark is still there, it might be time to stop.
Continuing to apply more product or scrubbing harder usually creates a bigger problem, like a faded patch or damaged fibres. If a targeted attempt doesn't get the job done, your best bet is to call a professional upholstery cleaner. They have specialised equipment and professional-grade solutions that can often remove what DIY methods can't.
When It’s Time to Call in the Professionals
Look, I’m a huge fan of DIY cleaning for everyday maintenance and tackling those little spills as they happen. But there comes a point where you need to know when to step back. Sometimes, calling in an expert is the smartest—and safest—move you can make for your furniture.
Let's be honest, sometimes a stain just has your number. You've tried every trick you know, but it’s not budging. At this point, continuing to experiment with different home remedies can do more harm than good, potentially setting the stain permanently or even damaging the fabric. That’s your cue to stop. A professional has an arsenal of specialised solvents and commercial-grade equipment that can often lift stains that household products simply can't touch.
When to Make the Call
There are a few scenarios where I’d always recommend bringing in an expert rather than risking a costly mistake. Think of it as an investment in your furniture's future.
- Delicate Fabrics or 'S' Codes: If you're dealing with silk, velvet, or any fabric with that tricky 'S' (Solvent Only) cleaning code, don't even think about using water. Professionals have the right water-free solvents and know-how to clean these sensitive materials without causing water rings, shrinkage, or colour loss.
- Serious Water Damage: A major leak or flood is not a DIY job. When upholstery is soaked through, a professional is essential. They use high-powered extraction machines to pull moisture from deep within the foam and frame, which is crucial for preventing mould and mildew from taking hold.
- Lingering, Deep-Set Odours: If smells from pets, smoke, or other sources have worked their way deep into the cushions, a surface clean just won't cut it. Pros can use techniques like ozone treatments or deep shampooing to neutralise odours at their source, not just mask them.
A Pro's Perspective: A professional clean isn't just about getting rid of a stubborn stain. It's about protecting the piece you've invested in and extending its life. This is particularly true after you've spent so much time choosing the perfect furniture for your living room.
Here in Australia, professional upholstery cleaning costs are a reflection of the job's complexity. Generally, you can expect to pay somewhere between AUD 170 to AUD 200 for a standard job, though this can vary depending on the size of the furniture and the type of fabric. It’s a small price to pay to properly remove ingrained dirt and prevent long-term wear and odours.
Your Top Upholstery Cleaning Questions Answered
Even with a solid guide in hand, it's completely normal to have a few lingering questions before you tackle your own furniture. After all, you want to get it right. We get asked about the finer points of upholstery care all the time, so let's run through some of the most common queries.
Think of this as your quick-reference FAQ. Getting these details sorted will help you build great habits to keep your sofas and chairs looking their best for the long haul.
How Often Should I Really Deep Clean My Fabric Sofa?
For everyday maintenance, you absolutely need to be vacuuming your furniture every week or two. This simple step is crucial for getting rid of surface dust, crumbs, and allergens before they get ground in.
As for a proper deep clean, a good rule of thumb is every 12 to 24 months.
Of course, that’s just a baseline. If your sofa is the heart of a busy home with kids and pets, you'll want to ramp that up to every 6 to 12 months. Staying on top of it this way prevents dirt from becoming deeply embedded and just makes for a healthier living space.
Expert Tip: Don't underestimate the power of regular vacuuming. It's your number one defence against the abrasive grit that literally wears away fabric fibres over time, which will genuinely extend the life of your furniture.
Can I Just Use a Steam Cleaner on Any Fabric Furniture?
No, absolutely not. A steam cleaner can be an amazing tool for a deep refresh, but it's only safe for fabrics that can handle water. You'll need to check the furniture's tag for a 'W' (for water-based cleaners) or 'W/S' (for water/solvent) cleaning code.
If you use a steamer on a fabric labelled 'S' (solvent only) or 'X' (vacuum only), you're asking for trouble. The intense heat and moisture can cause irreversible damage like shrinkage, colour bleeding, or stubborn water rings. This is particularly true for delicate materials like silk or certain velvets. Always, always check that tag first.
What’s the Best Way to Prevent Stains in the First Place?
An ounce of prevention is truly worth a pound of cure here. Your most powerful move is to apply a high-quality fabric protector spray after a deep clean. It works by creating an invisible shield that makes liquids bead up on the surface, giving you precious extra seconds to blot a spill before it becomes a permanent stain.
Beyond that, your best strategies are simple diligence: vacuum regularly and tackle spills the second they happen. For that extra layer of defence on the family's favourite armchair or sofa, a stylish, washable throw blanket is a fantastic solution that's both practical and adds a touch of personality.
At DLB Furniture, we believe that beautiful furniture should be easy to live with. For more inspiration and to find pieces designed for modern Australian homes, explore our full collection at https://dlbfurniture.com.au.


